WARNING! READ ENTIRE BLOG BEFORE ATTEMPTING THIS!
Hello again techies!
Today, we’re diving into the realm of Windows startup programs – those sneaky applications that launch themselves upon boot, either speeding up or slowing down your PC’s start time. Fear not, as I’ll guide you through the simple process of enabling or disabling them. Let’s get started!
For Windows 10 and 11, the process is very similar:
Press the magical key combination: Ctrl + Alt + Delete, This will open a window with a list of options, choose “Task Manager”.
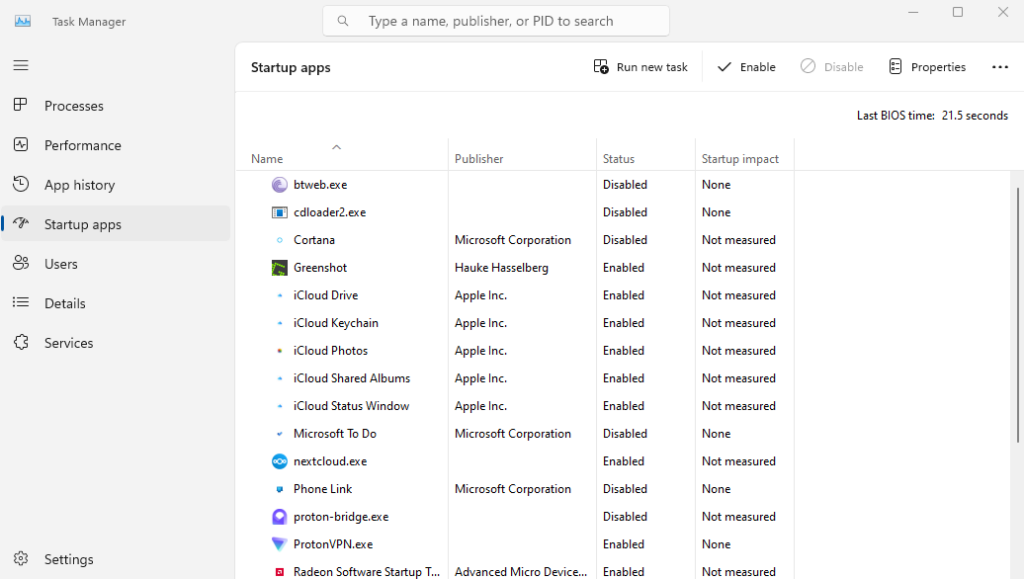
Within the Task Manager window, you’ll find various tabs like Processes, Performance, and more. Locate and click on “Startup Apps”.

Behold the list of programs with their Startup Impact, which indicates their effect on your PC’s boot time. Programs with a “High” impact are the ones likely causing the delay.
To disable a program from starting up with Windows, right-click on the program name and select “Disable.” This action won’t uninstall the program; it just prevents it from launching during startup.
To enable a program that was previously disabled, right-click on the program name again and choose “Enable.”
After making your desired changes, you’ll notice an improvement in your PC’s startup time. Fewer unnecessary programs running at startup means a quicker boot and a smoother overall experience.
A Word of Caution:
While it may be tempting to disable all the startup programs to get a faster boot time, be cautious about disabling essential system programs or anti-virus software, as they play a crucial role in maintaining your PC’s security and functionality.
Congratulations, You’ve now mastered the art of enabling and disabling startup programs in Windows 10 and 11. Enjoy a faster and more efficient startup process, tailored to your preferences and needs. Now, go forth and unleash the true potential of your PC!

