Are you ready to make the leap from Windows to Linux but don’t know where to start? You’re in the right place! Linux Mint 21.2 is a fantastic choice for beginners looking to explore the world of Linux. In this step-by-step guide, we’ll walk you through the process of installing Linux Mint 21.2, highlighting why it’s the best distribution for newcomers transitioning from Windows.
Why Linux Mint 21.2?
Linux Mint has earned a reputation as one of the most user-friendly Linux distributions available. Here are some reasons why it’s a great choice for Windows users:
- Familiar Desktop Environment: Linux Mint uses the Cinnamon desktop environment, which offers a familiar interface for Windows users, making the transition smoother.
- Software Manager: Mint’s Software Manager makes it easy to find and install applications, similar to the Windows app store.
- Great Community Support: Linux Mint boasts an active and friendly community, which is a valuable resource for beginners seeking help and advice.
- Stability: Mint is based on Ubuntu, one of the most stable Linux distributions, making it reliable for everyday use.
Now, let’s dive into the installation process.
Step 1: Download Linux Mint 21.2
Visit the Linux Mint website (https://linuxmint.com/) and download the ISO file for Linux Mint 21.2. Choose the appropriate edition (Cinnamon, MATE, or Xfce) based on your hardware and personal preferences.
Step 2: Create a Bootable USB Drive
To install Linux Mint, you’ll need a bootable USB drive. You can create one using software like Rufus (Windows https://rufus.ie/en) or Etcher (Windows, macOS, Linux). Insert a blank USB drive (at least 8GB in size), select the Linux Mint ISO file you downloaded, and follow the instructions to create the bootable drive.
Step 3: Boot from the USB Drive
Insert the bootable USB drive into your computer and restart it. You may need to change the boot order in the BIOS or use a boot menu key (usually F2, F12, or Del) to boot from the USB drive. Select “Start Linux Mint” from the boot menu when prompted.
Step 4: Try Linux Mint (Optional)
Before installing Linux Mint, you can choose to try it out from the live environment. This lets you experience the distribution without making any changes to your system. Take your time to explore and ensure it meets your needs.
Step 5: Install Linux Mint
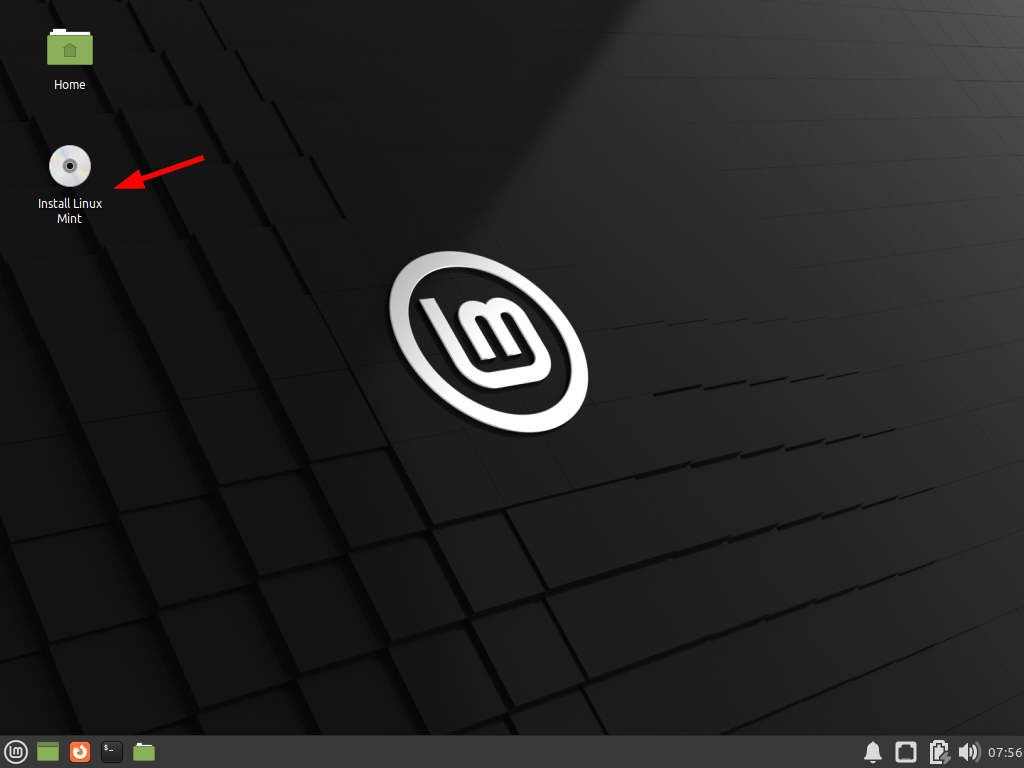
Once you’re ready to proceed, double-click the “Install Linux Mint” icon on the desktop. Follow the on-screen instructions, selecting your language, keyboard layout, and timezone. When prompted, choose the installation type:
- “Install Linux Mint alongside Windows” if you want to keep both operating systems.
- “Erase disk and install Linux Mint” if you’re ready to switch completely to Linux Mint (Make sure to back up your data first).
- Customize your installation if you have specific partitioning requirements.
Step 6: Set Up Your User Account
During the installation, you’ll be prompted to create a user account. This account will have administrator (sudo) privileges, so choose a strong password.
Step 7: Install Additional Drivers and Software
After the installation, Linux Mint may prompt you to install additional drivers for hardware components like graphics cards or Wi-Fi adapters. Follow the prompts to ensure your hardware works seamlessly.
Step 8: Update Your System
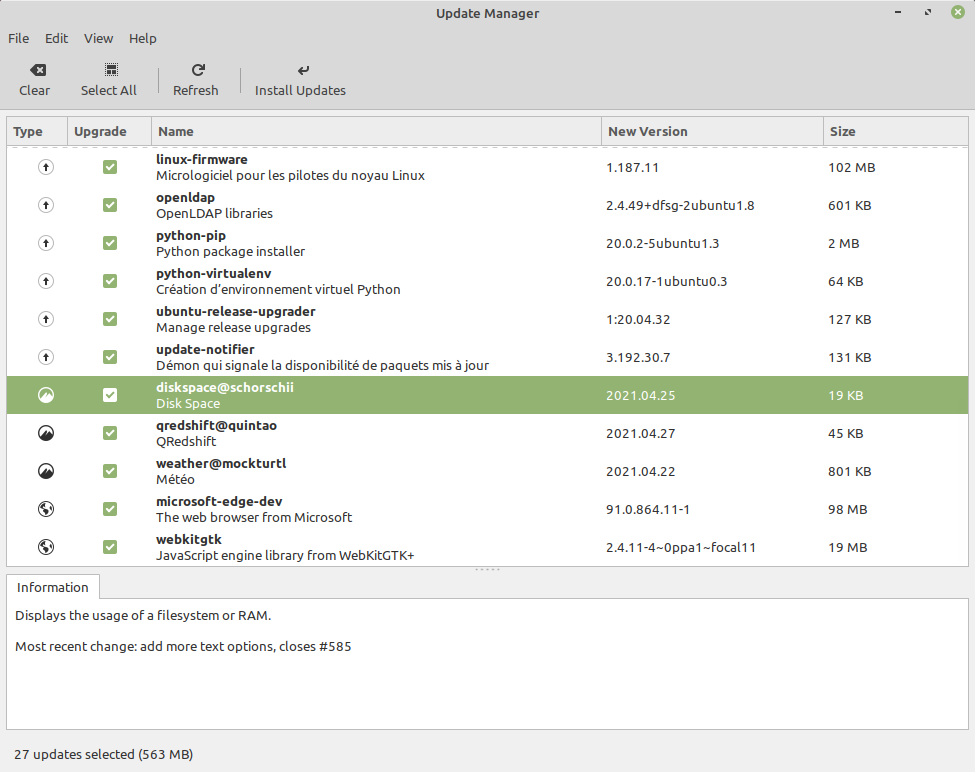
Once you’re in your Linux Mint desktop, open the Update Manager and install any available updates. This will ensure your system is up to date and secure.
Congratulations! You’ve successfully installed Linux Mint 21.2, and you’re on your way to enjoying a user-friendly and reliable Linux experience. Remember that transitioning from Windows to Linux might take some time to adapt, but with the help of the supportive Linux Mint community, you’ll be navigating your new environment like a pro in no time. Explore the vast world of open-source software and enjoy the freedom and flexibility that Linux Mint offers. Welcome to the world of Linux!